What if I told you that you could set up a new frog, lizard, or snake habitat, in which you wouldn’t have to work as much. You’d still need to feed your pets and add some water to the habitat on a regular basis, but things like removing feces and replacing the substrate would quickly become distant memories.
That’s exactly what bioactive vivaria design seeks to do –create an (essentially) enclosed ecosystem, which seeks to establish the same types of biological mechanisms that recycle waste and create new tissue in natural habitats.
Now, this is not the easiest trick in the world to pull off. It takes a lot of effort, some investment, and a ton of experimentation. But if you achieve some degree of success, you and your animals will be happier for it. Establishing a bioactive vivarium is not easy nor simple, so we obviously can’t explain everything you’ll need to know here.
But we’ll explain the basics of this process below, so you can jump in and test the bioactive waters yourself.
Quick Navigation
The Basics of Setting Up a Bioactive Vivarium
To begin, we need to explain the basic principles and goals of a bioactive vivarium, and the techniques and strategies by which they’re achieved.
- The goal of a bioactive vivarium is to achieve a balance between the habitat’s inputs and outputs. This is very rarely achieved (especially for those maintaining vertebrates – some bioactive vivaria primarily comprised of plants and invertebrates have been “sealed” for long periods of time), incremental improvements still provide value.
- If you are very successful, you’ll find that your pet’s waste breaks down “naturally” via the processes occurring in the enclosure. This means you’ll have to remove less – if any – feces or urates.
- Plants are an essential necessity for bioactive vivaria. However, if you set up an effective bioactive vivarium, your plants are likely to thrive. In fact, they’ll not only thrive, but they’ll also provide organic material that will slowly make its way back into other plants in the vivarium over time.
- Bioactive vivaria are much easier to establish with small animals. Bioactive vivaria must often be much larger than “sterile” habitats provided to the inhabitants, which presents obvious challenges. But also, you’ll find that establishing a miniature ecosystem capable of dealing with the feces of tiny frogs is much easier than establishing a colony capable of breaking down the massive waste some large snakes produce in a reasonable time frame.
- Some reptile and amphibian species are naturally well-suited for bioactive vivaria maintenance. Others are simply not well-suited for these approaches. That doesn’t mean you can’t attempt to establish a bioactive vivarium for any species you like, but success for many will prove elusive.
- The establishment of natural vivaria may cost more than you’d spend on a sterile habitat, but it won’t cost appreciably more over time.
Bioactive Vivaria: Species Selection
The first thing you’ll need to decide before setting up a bioactive vivarium is the species that’ll live in it. This will influence a number of your later decisions and establish the basic parameters of the habitat.
Theoretically, in the grand scheme of things, all animals live in gigantic bioactive vivaria – Mother Nature has been keeping her pets this way for millions of years. But in practice, you’ll find that some species are much better suited for complex, “living” habitats than others.
A few of the species and groups of species keepers most commonly have success with include:
- Small Terrestrial Frogs, including cricket frogs, poison dart frogs, and mantellas.
- Most tree frogs
- Most arboreal geckos and anoles
- Small terrestrial lizards
- Arboreal snakes
- Very small terrestrial snakes
Conversely, some of the poorest choices for bioactive vivaria include most medium-sized to large reptiles, as they’ll simply require more space than most keepers are willing and able to provide (remember that bioactive vivaria should be much larger than a typical habitat provided to a given animal). Additionally, large snakes, lizards, or turtles are likely to be too destructive to the plants and features you install.
Desert-dwelling reptiles are also tough to maintain in bioactive vivaria, as it is difficult to provide a habitat that is sufficiently arid for your pet yet outfitted with enough damp refugia for the decomposers. Accordingly, it is generally wise to select species that inhabit forests or riparian areas.
Bioactive Vivaria: Supplies and Tools You’ll Need
Having decided which species will be the “stars” of the habitat, you can now begin assembling the various supplies and tools you’ll need to get everything up and running. Because the species you select will influence the exact supplies and layout of the vivarium, you may have to make small adjustments to the following list.
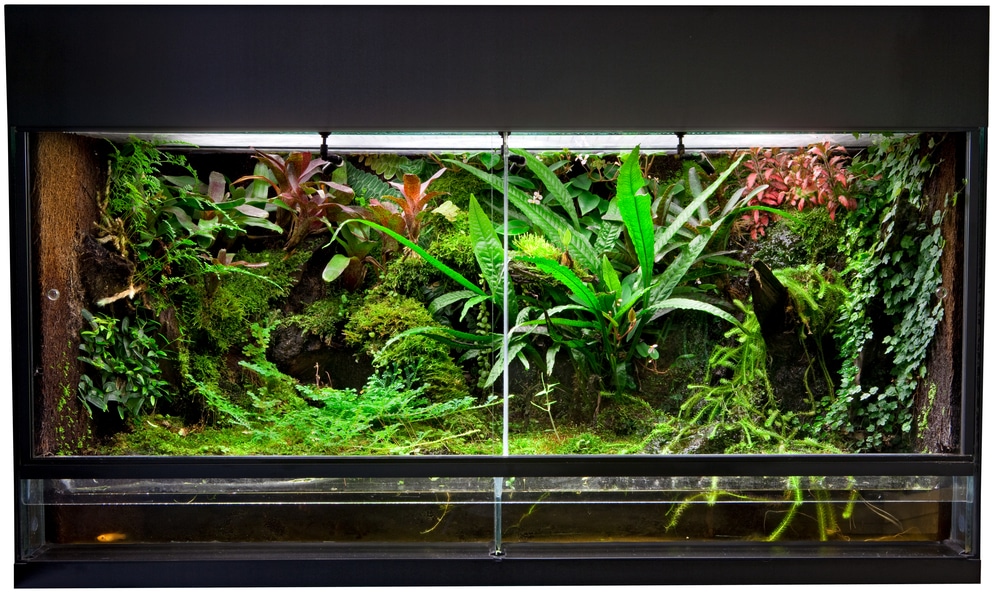
Enclosure
Most keepers will use glass aquaria or similar enclosures for bioactive vivaria, but there’s no reason you can’t opt for a commercial plastic habitat or a custom-built enclosure instead. You’ll simply want to consider a few factors and make the best choice for your circumstances and the species you’ve chosen to keep.
The primary things you’ll want to think about when making your choice are the durability of the enclosure, it’s ability to tolerate damp or wet conditions over long time periods, and the visibility it provides – if you go to all the trouble of setting up a bioactive vivarium, you’ll definitely want to show it off.
One other thing you’ll want to keep in mind is the size of the habitat; bioactive vivaria must be much larger than “sterile” enclosures containing the same inhabitants. As a general guideline, try to select an enclosure that is at least twice as large as you would normally provide the inhabitants, and thrice as large would be even better.
Heating and Lighting Devices
Your decisions regarding heating and lighting devices will largely influence each other, as most lights will elevate the temperature of the habitat to some degree. For that matter, you may be counting on the lights to provide suitable temperatures in the enclosure, particularly if you’re keeping tropical reptiles.
So, it is typically best to consider the best type of heating devices for the habitat and then adapting your lighting plan accordingly. Some keepers utilize non-light-emitting heating devices (such as radiant heat panels, heating pads, or heat cables), but others prefer to rely on heat lamps – the old standby.
For lighting, LED or fluorescent bulbs will generally provide the best results. Just be sure to select UVB-producing bulbs if you intend to keep reptiles or amphibians that require this type of light.
Temperature and Humidity Monitoring Equipment
As when maintaining any reptile or amphibian enclosure, you’ll need to ensure that you provide an appropriate thermal environment. This means using a digital indoor-outdoor thermometer to monitor the ambient air temperature in the enclosure, and it is also a good idea to pick up a non-contact, infrared thermometer to check the surface temperatures of basking spots and other warm surfaces in the enclosure.
It’s also wise to use a humidity gauge (hygrometer) to monitor the amount of moisture in the air inside the enclosure, particularly if you’re maintaining delicate species, who require very high humidity levels. However, hygrometers are generally not considered mandatory equipment in the same way that indoor-outdoor thermometers are.
Substrate
There are several different substrates you can use for your bioactive vivarium, but some clearly work better than others. A few of the best substrates include:
- Soil
- Shredded coconut bark
- Orchid bark
- Cypress mulch
Each of these substrates offers a different slate of benefits and drawbacks. For example, soil will produce the most natural-looking habitat, but it can also tend to make everything dirty, and it’s easy for it to become waterlogged if you aren’t careful. Shredded coconut bark will hold lots of moisture, but it lacks the diverse collection of organic material that a good soil will.
Cypress mulch tends to hold more moisture than orchid bark, and it’s also more affordable in many places. However, most keepers agree that orchid bark simply looks more attractive. Additionally, the price of both of these bark products tends to vary with geography, so you may find that orchid bark is actually more affordable in some locations.
Note that if you choose soil, you’ll want to purchase an organic variety with no additives (such as perlite or fertilizers). You can collect soil yourself if you have access to a clean and ready supply, and this provides an additional bonus of “inoculating” the habitat, thanks to the myriad organisms lurking inside.
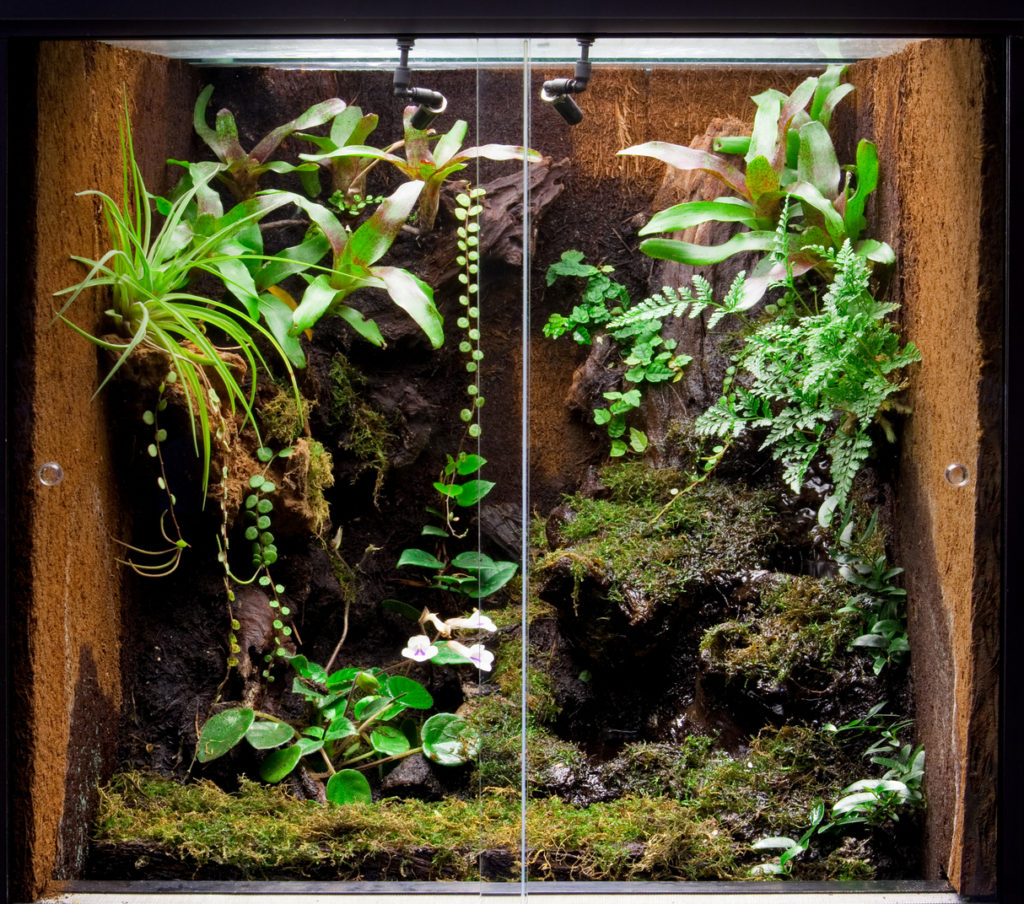
Background Materials
You don’t have to include a background for your bioactive vivarium, but many keepers enjoy doing so and like the way it looks. There are likely an endless number of ways you can add a background to your habitat, and you’ll have to tweak your plan to suit the habitat you’re trying to recreate and the species you keep – not to mention your aesthetic tastes.
However, typical bioactive vivaria backgrounds are usually made from a combination of silicone, expanding foam, shredded coconut husk, and cork bark. They’re applied to the back wall of the enclosure in the order listed, and then plants are often added as a final step.
If you’re ambitious, you can even add a bit of “three-dimensionality” to the background by including various ridges, bumps, or divots.
Plants
You’ll need to add several plants to your bioactive enclosure. There are surely hundreds of species that would work, but you’ll simply need to select those that’ll work well for the habitat you are creating. Nevertheless, you’ll typically find that all plants that work well in bioactive vivaria are relatively small, thrive in low light, and tolerate high moisture levels.
Aside from selecting the plants, you’ll want to give some thought as to how you intend to install them in the habitat. You basically have two options: You can leave them in the pots and try to obscure the pots with other decorations, or you can install the plants directly into the substrate.
The latter option almost invariably yields more aesthetically pleasing results. However, the former option will make it much easier to maintain the habitat. For example, if a potted plant dies, it is a simple matter to remove and replace it. On the other hand, the replacement of a plant that’s been planted in the substrate will require an elaborate excavation.
Water Reservoirs
Most terrarium inhabitants will require some type of drinking water dish (although some arboreal lizards and snakes may satisfy most of their water requirements by drinking droplets of water left behind after you mist the habitat). And as with the subject of plant installation, you have multiple options from which you can choose.
- You can use a standard water dish and try to conceal it. Because standard ceramic water crocks are easy to clean, they provide numerous benefits – you’ll just need to hide them in some way. Corkbark or rocks are likely the easiest options, but you can also install plants around them.
- You can use a decorative, realistic-looking water dish. There are tons of water reservoirs on the market that are designed to mimic log cavities, seashells, and depressions in rocks. The best examples can look quite nice, but these types of water dishes are more challenging to keep clean and offer plenty of nooks and crannies in which bacteria and fungi can grow.
Hide Boxes, Branches, and Similar Items
Now that you have the primary components of the habitat in place, you can begin filling things in with visual barriers and decorations. The possibilities are essentially endless, but some of the most common things used in bioactive vivaria include:
- Large bark pieces (primarily corkbark)
- Branches and half-logs
- Faux wood pieces (ceramic or plastic)
- Rocks and faux rocks
- Bones and skulls
- Turtle shells
- Seashells
- Vines
Just keep in mind that most terrarium inhabitants will require a hiding spot, so that’s typically one of the first things you’ll want to install. Also – and this cannot be stressed enough – avoid overcrowding the enclosure. Most importantly, this will reduce the amount of space available to your pets and complicate their care. However, it will also look cluttered and lack the visual appeal you want.
Invertebrates and Decomposing Organisms
Finally, with all of the other habitat ingredients now in place, it is time to put the bioactive in bioactive vivaria. Again, the thing that will make your vivarium bioactive is the presence of decomposing organisms that’ll recycle the wastes your pets produce (to varying degrees of success).
Different hobbyists find success with different decomposers, but a few of the most common picks include earthworms, millipedes, woodlice (pill bugs), and springtails. However, you can try just about any macroinvertebrate that is available, safe for your pets, and unlikely to cause problems for you.
Nevertheless, it is also important to “seed” the habitat with the decomposing fungi and bacteria that’ll do a lot of the heavy lifting. You can try to do so by collecting the dirt under logs in the forest or rocks near streams, and you can also introduce pieces of actively decomposing wood in the habitat too.
It may take you a considerable amount of experimentation to establish (and maintain) a balanced system.
Bioactive Vivaria: Setting Up the Habitat
Having chosen the inhabitants for your vivarium and gathered the necessary supplies and tools, you’re ready to start construction. Note that just as no two bioactive vivaria are exactly the same, the construction process will differ slightly from one case to the next. However, the basic plan outlined below should work in most cases, provided that alterations are made where needed.
Select a Good Location for the Vivarium
Before you start plugging in lights and getting your hands dirty, you have to start by selecting a location for the vivarium. Don’t rush this decision, as it’ll have many long-lasting ramifications. As with most other steps in constructing your bioactive vivarium, you’ll have to consider your specific situation and make the best decisions you can – it is hard for us to generalize enough to provide actionable advice.
Nevertheless, a few important things to consider before deciding on a location for your vivarium include:
- Are there any vents in the area that’ll make it difficult to maintain proper habitat temperatures or cause the habitat to dry too quickly?
- Does the area get direct sunlight that may lead to rising enclosure temperatures?
- Are there enough outlets in the area for all of the habitat’s equipment?
- Is there an easy route outdoors from the location, which may be helpful when installing or removing messy items?
- Is there a nearby source of water, or are you going to have to walk up or downstairs to reach a source?
- Will any children or pets be playing nearby, and therefore likely to topple or damage the habitat?
- The aesthetic concerns of the location – is it somewhere that’ll make it a good focal point of the room?
- Do you have a stand for the habitat, or will you need to place it on some other type of furniture?
Once you’re satisfied with your answers to these questions, you can place the enclosure (carefully!) and move on to the next step.
Set Up any Under Tank Heating Devices You Intend to Use
At this point, you’ll want to install any under tank heating devices, such as heat pads, heat tape, or heat cables. Just be sure to follow the manufacturer’s instructions – particularly the safety guidelines, such as allowing airflow over the heating elements – while doing so.
Also, don’t forget that even though you are creating an elaborate, bioactive vivarium, you’ll still want to embrace basic husbandry protocols. In this particular instance, that means providing a thermal gradient for your pets. In other words, you want the enclosure to be warmer on one side, and cooler on the other. This will allow your pet to move around the enclosure as is necessary to adjust his body temperature.
So, when installing the under-tank heating devices, you’ll likely want to cluster them at one end of the enclosure.
Install the Background
If you intend to install a background (not all hobbyists do), you’ll want to begin the construction of it at this point in the process.
There are dozens of ways to install a background for your habitat. For example, you may simply want to adhere a photograph or graphic background to the rear wall of the habitat. But one of the most popular background styles involves creating a three-dimensional backdrop, comprised of several realistic-looking materials. A simplified outline of this procedure would unfold as follows:
- Coat the entire rear wall of the habitat in expanding foam. Don’t make the foam flat – try to create ridges, divots, and other interesting shapes with the foam. Also, if you intend to mount any plants on the back wall, be sure to add compartments or recesses in which you can install the plants.
- Once the foam is dry, add a thin layer of silicone to the entire foam surface.
- Before the silicone dries, add decorations like corkbark and small branches. In some cases, you may need to use more expanding foam to provide the support necessary.
- After you’ve added the primary decorations (and before the silicone dries), add things like coconut husk, moss, and sand. This will cover the silicone and give the rear wall a natural appearance.
- At this point, you can begin installing any plants or other decorations to complete the background.
Install Any Large-Scale Habitat Features
With the background in place, you can now begin adding large-scale habitat features, such as waterfalls, false walls, hiding spots, and similar things. There’s no way to explain how to install the myriad features possible, so you’ll simply have to use your best judgment and engage in some trial and error.
Just be sure to keep the safety of your pets in mind when completing this step. For example, if you’re installing climbing branches, be sure that they are secured well enough that they can hold the weight of your pet. Similarly, if you want to add hiding places or rock ledges, be certain that they are stable and will not collapse on your snakes, lizards, or frogs.
But, there is a fine line you’ll have to walk here, too: From time to time, you may need to remove some of these items for habitat maintenance. In such cases, you’ll need to avoid using adhesives – you’ll simply need to design these features in a way that supports their weight, yet still allows you to remove them.
Add a Drainage Layer to the Enclosure
Most hobbyists will want to add a drainage layer to their bioactive vivarium, and this is the proper step in the vivarium-building procedure to do so. A drainage layer will help to ensure that the bottom layers of the substrate do not become waterlogged and foster bacteria and fungi.
In most cases, gravel makes the best drainage material. Just place a 1- to 4-inch-thick layer of gravel in the bottom of the enclosure (use care if you’re using a glass enclosure – you don’t want to crack the bottom). Don’t make the layer completely flat, as this won’t look as interesting. Instead, create a bit of “terrain” by including small mounds, depressions, and other features. Pea gravel is the most common choice among hobbyists, but some keepers do like to use larger rocks instead.
Once you have a layer of gravel in place, lay a piece of window screen on top. This will prevent the substrate from falling between the gaps in the rocks.
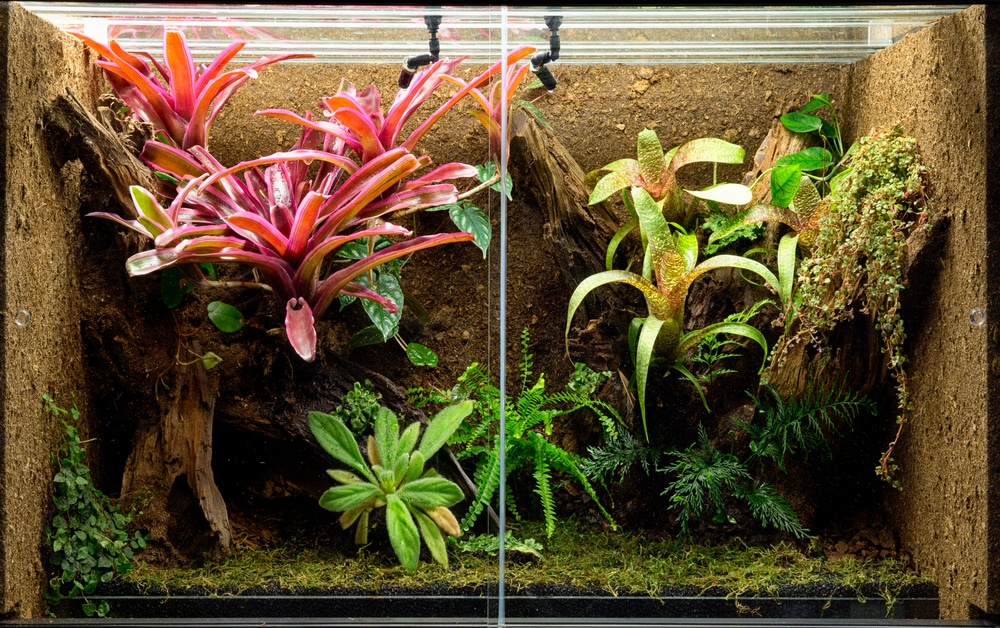
Add Medium- and Small-Scale Habitat Features (Including Plants)
Now that your habitat is beginning to take shape, you can start adding medium- to small-scale habitat features. This includes things like small decorative branches, hanging vines, plant clusters, and water dishes.
Just be sure that you don’t add too many of these types of decorations, as cluttered vivaria rarely look impressive. Also, as with the large-scale habitat decorations and features, try to place corkbark, sticks, and other decorations in a way that facilitates easy removal when necessary.
When adding the plants, be sure to place them in a manner that allows for their growth (unless you intend to keep them pruned) and avoid placing them in locations that’ll be directly under heat lamps, as this will usually prevent the plants from thriving.
As discussed earlier, you can keep the plants in their pots if you like, just use cork bark and other items to obscure the containers. But, if you intend to bury the plants in the substrate, just clean the roots off and splay them out on top of the screen in the locations you want them to be.
Add Your Substrate of Choice to the Enclosure
This is obviously a big project, but don’t worry — you’re getting close to the end! At this point, you’ll want to add the substrate to the enclosure. The two most common choices are likely soil or coconut husk (or a combination thereof). You can purchase compressed bricks of coconut husk, and you can purchase an organic, additive-free soil or dig up your own from a safe source.
Be careful not to add too much substrate, as this will increase the weight of the vivarium greatly without providing much of a benefit. Typically, a 1- to 3-inch-thick layer is sufficient. Note that adding substrate will often yield a layer of dust, which you’ll want to clean before progressing any further in the process.
Make Final Aesthetic Tweaks
Before moving on to the last two steps in the process, take a moment to examine the vivarium and make any aesthetic tweaks necessary. Do you want that plant in a different location? Would the water dish be better hidden by placing it somewhere else? Can you see one of the plant containers?
Now is the time to make these types of changes. Just be sure you are 100% happy with the layout of the enclosure before proceeding.
Add Invertebrates and Other Decomposers
With the end in sight, it is now time to add invertebrates and decomposers to convert this standard vivarium into a bioactive vivarium. There’s not much to this step (assuming you’ve already collected the decomposers you intend to use) – just add the worms, pillbugs, springtails, and other invertebrates to the enclosure.
Just do so carefully, as many of these animals are quite delicate. Also, it is a good idea to place them near or under bark or other surface items. Be sure to add some water (dechlorinated or spring water) to the enclosure at this point to prevent the invertebrates from desiccating. You don’t want to saturate the area but be sure that the substrate near the places you add the invertebrates is damp.
You’ll also want to add the decomposing wood you collected earlier to the habitat at this point. You may even want to shake these pieces of wood over the substrate to help “seed” the habitat with plenty of bacterial and fungal spores.
Add Lighting, Thermometers, Overhead Heating Devices, and Any Other Electronic Devices
With everything inside the habitat now in place, you’ll need to add the exterior heating devices, lighting fixtures, and the thermometers you’ll use to monitor the enclosure temperatures. This is generally a straightforward step in the process, so just take your time and be sure that you install them in a sensible manner. Don’t forget to situate the heating devices at one end of the enclosure to provide a thermal gradient and consider staggering the lights (if possible) to create a similar “photo gradient.” This will mimic the natural world, in which there are scattered patches of sunlight and shade.
Congratulations! You should now have a working bioactive vivarium. However, you’re not ready to add any pets yet – you’ll first want to monitor the environmental conditions in the habitat over two to four weeks. Use this time to ensure that you’re achieving your target temperature and humidity levels and let the decomposers “settle in.”
Once you’re convinced that the habitat is functioning properly, you can introduce your pets.
Maintaining Your Bioactive Vivarium
Ideally, you’ll find that your bioactive vivarium “takes care of itself” over time. But you’ll still need to provide some routine care and maintenance. While the specific tasks you’ll need to do (and the frequency with which you’ll need to do them) will vary from one vivarium to the next, most habitats will require you to do some or all of the following:
- Monitor the health of your pets. Every day, you’ll want to observe the vivarium inhabitants (you needn’t necessarily handle them to do so) and ensure they are in good health. If you notice any significant problems, it may be wise to relocate them to a “sterile” habitat until you’ve figured out how to rectify the problem and return your pet to good health.
- Ensure proper environmental conditions. Make a practice of checking the enclosure temperatures every day when you observe your animals. If the temperatures are not in the proper range, make any changes necessary.
- Ensure that your pets have clean, fresh water. Another daily task you’ll need to complete is to verify that your pets have access to clean, fresh water. In some cases, this will entail misting the enclosure thoroughly so your pets can drink droplets of water. But in other cases, you’ll need to empty and refill the water dish. Be sure that you wash the water dish with soap and warm water at least two or three times each week to keep it clean. It’s also a good idea to sterilize it by soaking it in a weak bleach solution once a week or so.
- Feed your pets. Obviously, you’ll need to feed the enclosure inhabitants on a regular basis. In most cases, this will involve adding a dozen or so insects to the enclosure, but – if you’re keeping a snake – you’ll have to feed your pet a frozen-thawed rodent with forceps. Just be sure that if you add insects to the enclosure, your pet is able to find and consume them in a short period of time.
- Tend to the plants. The plants in the enclosure will require regular maintenance too. Just be sure that the soil they’re growing in is sufficiently damp (but not too damp) and prune any new growth as necessary.
- Monitor the decomposers in the enclosure. Be sure to check on the invertebrates in your enclosure periodically. Some will undoubtedly die over time, so replace them with new decomposers as necessary. You aren’t terribly likely to see many earthworms or other subterranean decomposers very often, so some hobbyists simply like to add fresh ones once per month or so.
- Clean the enclosure walls. Once per week, take a few minutes to clean the enclosure walls with a weak vinegar-and-water solution. Note that you can use paper towels or a squeegee when doing so, but newspaper is often the best material for the task, as it won’t leave streaks behind.
Most traditional, “sterile” reptile and amphibian habitats should be completely broken down and cleaned from top-to-bottom on a regular basis (usually monthly). However, the very nature of a bioactive vivarium is at odds with this. Accordingly, most keepers break down their bioactive vivarium very rarely, if ever.
Conclusion
Obviously, setting up a bioactive vivarium is more complicated than establishing the kind of “sterile” habitat typically used to maintain reptiles or amphibians. It’s also a more challenging endeavor, which will require you to put in more time and effort to achieve the desired results.
But those who’re willing and able to meet these challenges will be pleased with they invested the necessary time and energy in the project, as a well-designed, properly executed bioactive vivarium is a sight to behold. Not only do they resemble real habitats, but they provide a higher quality of life for the inhabitants too.
This not only ensures that keepers can enjoy the aesthetic beauty of their vivarium, but also the knowledge that they’re providing their pets with the very best habitat possible.